
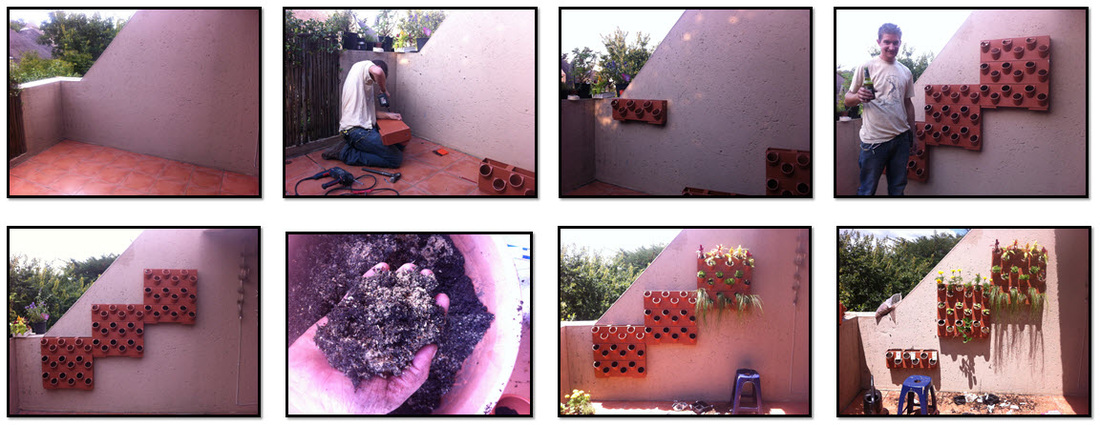
After much inspiration from various Facebook pages, I decided to make my own living wall. The unit in my complex is surrounded by trees which means lots of shade. You need full sun to grow your own food. Solution? Grow on the balcony upstairs.
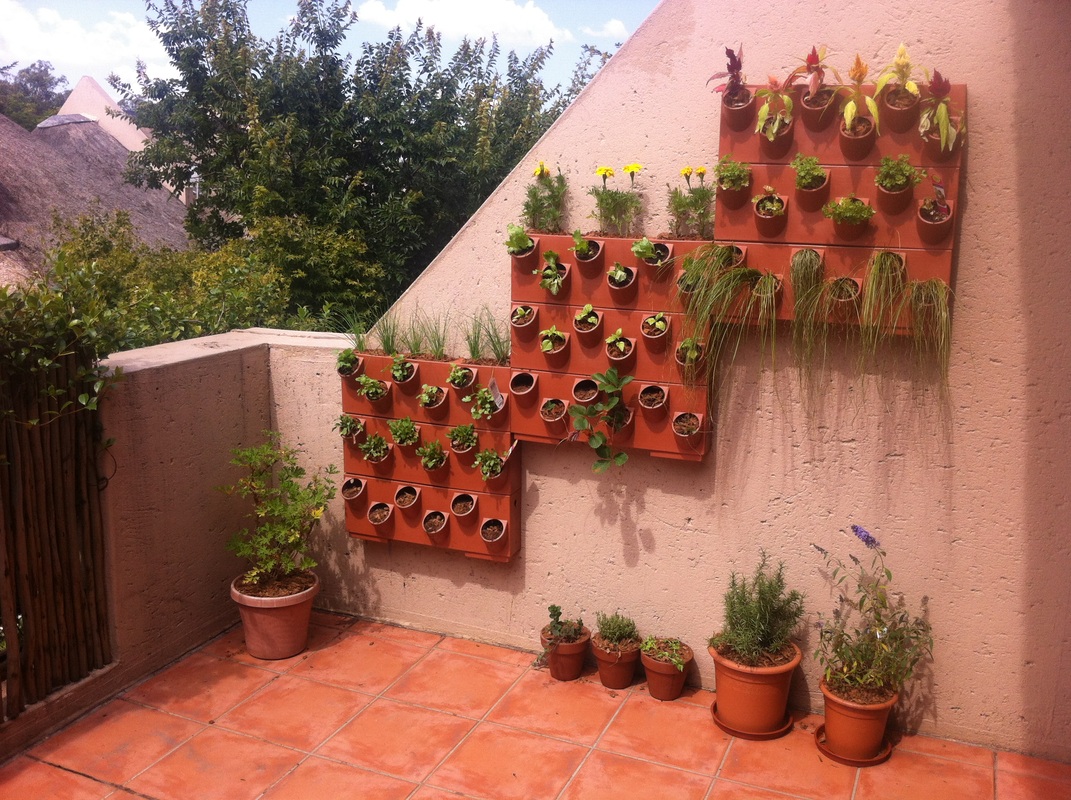
I've planted coriander, parsley, mint, rosemary, rocket, chives, cherry tomatoes, cucumber, strawberries, gooseberries, sage, thyme and basil.
Planter Tips :
1. Those units on the wall are available in different colours from good nurseries. There are a couple of variations on this design. I like this one because water travels into the hole below it to reduce waste. These were purchased from Lifestyle Nursery in Beyers Naude Drive, Jhb.
2. Put pots on the ground underneath them to catch overflow water.
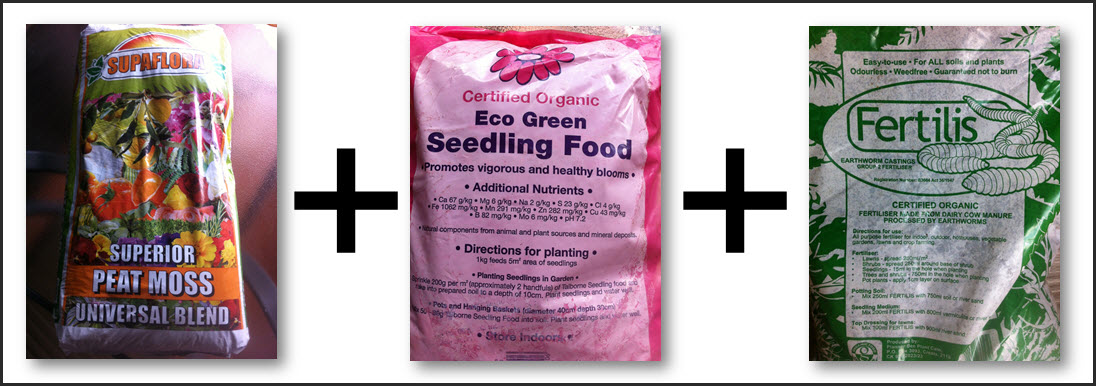
3. It's how you prepare the soil that counts the most. These only contain peat moss which retains a lot of water. It's mixed with an organic seedling food from Talborne Organics, and topped with a centimetre of earthworm castings. I topped off all exposed soil with coconut husks to help retain moisture.
Planter Tips :
1. Those units on the wall are available in different colours from good nurseries. There are a couple of variations on this design. I like this one because water travels into the hole below it to reduce waste. These were purchased from Lifestyle Nursery in Beyers Naude Drive, Jhb.
2. Put pots on the ground underneath them to catch overflow water.
3. It's how you prepare the soil that counts the most. These only contain peat moss which retains a lot of water. It's mixed with an organic seedling food from Talborne Organics, and topped with a centimetre of earthworm castings. I topped off all exposed soil with coconut husks to help retain moisture.
4. The holes at the back of the planters were too small of the screws that went into the wall. We took a drill and widened the hole - problem solved. The planter units are all separate and just clip into each other and onto the wall. That makes them easy to take off to reposition or replant.
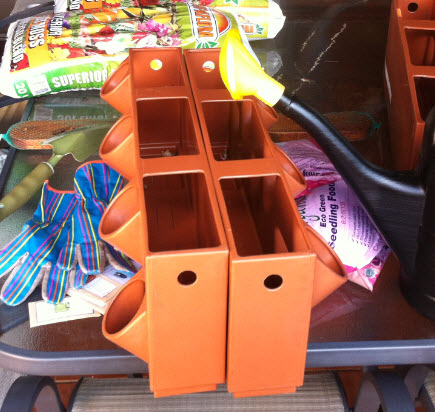
5. It takes ALOT of peat moss to fill these babies. I bought 10 bags, got one left. Push the peat moss in so the seedling roots feel secure.
6. Plant the seedlings before you put the unit on the wall, you need manouvre space.
7. Place the units on the wall from the bottom up.
8. On the last top unit, you have extra planting space. I used them to put some pretty flowers for now while I wait for the food to grow. Over time they will be replaced with edible goodies once the rest have grown up.
9. The only wall I have available is West facing - it gets extremely hot throughout summer. Check the seedlings every day to see if they need water. I have a watering can upstairs that I keep full, as well as a spray bottle to cool the babies down.
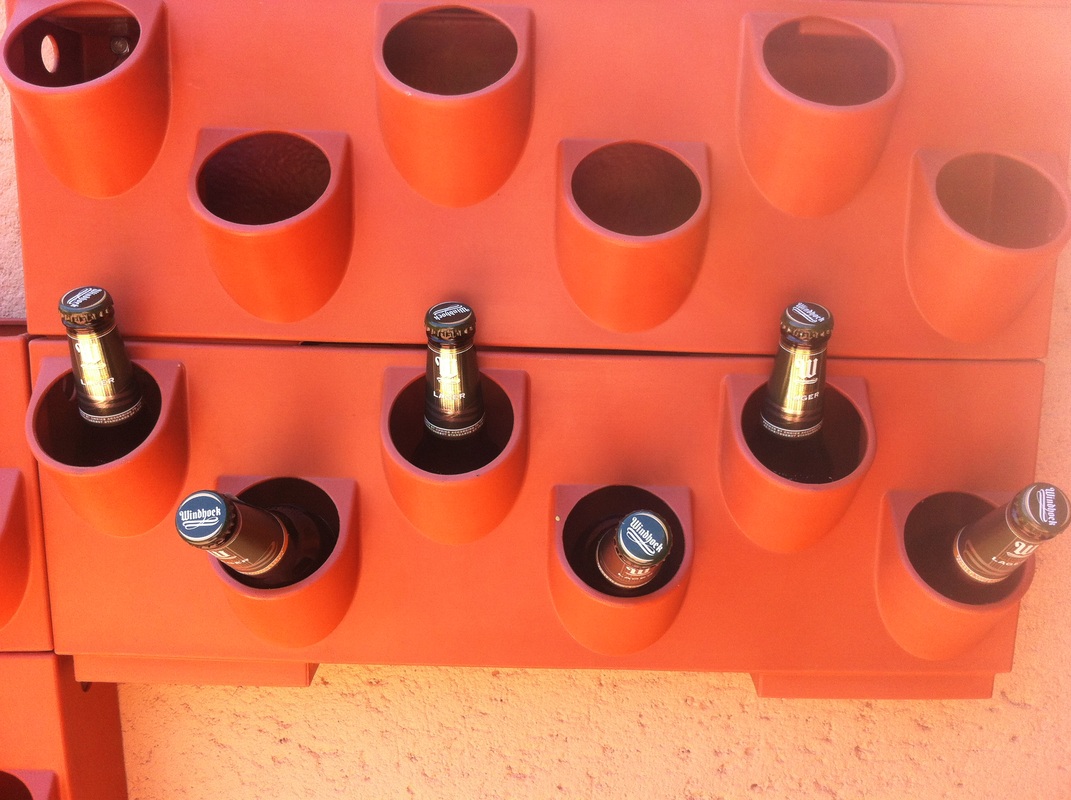
10. If you don't have the strength to plant yet, it would make an awesome living wall cooler box for a party - 1 x beer garden! Put ice on the inside and stick the beers in the holes! ;-)
6. Plant the seedlings before you put the unit on the wall, you need manouvre space.
7. Place the units on the wall from the bottom up.
8. On the last top unit, you have extra planting space. I used them to put some pretty flowers for now while I wait for the food to grow. Over time they will be replaced with edible goodies once the rest have grown up.
9. The only wall I have available is West facing - it gets extremely hot throughout summer. Check the seedlings every day to see if they need water. I have a watering can upstairs that I keep full, as well as a spray bottle to cool the babies down.
10. If you don't have the strength to plant yet, it would make an awesome living wall cooler box for a party - 1 x beer garden! Put ice on the inside and stick the beers in the holes! ;-)
The production line...
 RSS Feed
